Member Database Search
|
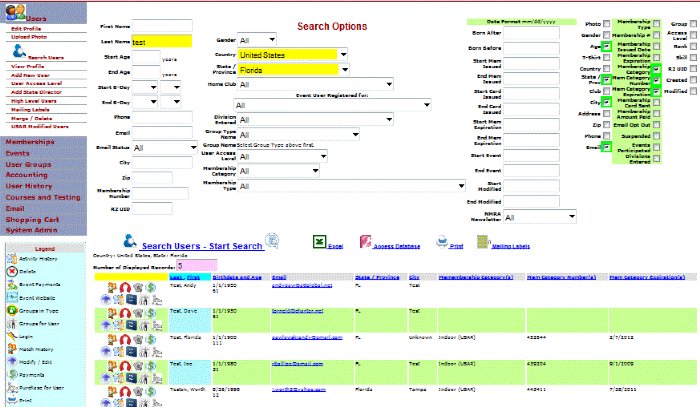
The member database search tool allows someone to search all the users in the system.
The top left of the screen shows all the search filter options that are available including: First and last name, age of the users, start and ending birth dates to send out happy birthday wishes, phone, email, email opt in status, city, zip code, membership number, and user ID. The next column allows you to filter by gender, country, state / province, home club or venue, event user registered for, group type, group name, access level, membership category and type.
The final search options column has the following additional filter options: Born before and after date, membership issued date, membership expiration date, start and end event date, and modification of record date.
The far right three columns, that have check boxes next to them, are used to indicate which fields that you want to show up in the member database report. Most of the same filterable data options are available for displaying in the report.
|
After selection choices are made for the member database search, click the search users link to have the report generated. Click the excel icon to save the repot as an excel file. Click the Access database icon to save the report as a database that you can download, click the print icon to print what is on the screen, and click the mailing labels icon to generate mailing labels for everyone in the report.
Each record in the report will have column headers that are linked. Click on the linked word in the column header to order the report by that column. Icons on the left side of each record allow the user to several different actions including: Viewing the user’s profile, modifying profile data, viewing payments and membership site activity history, and renewing the user’s membership.
|